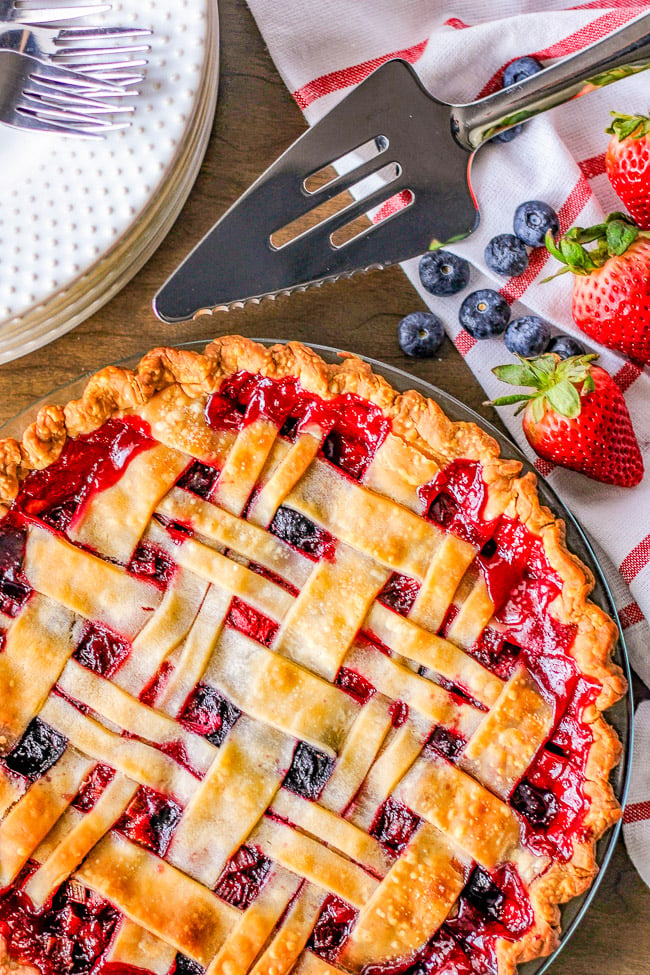
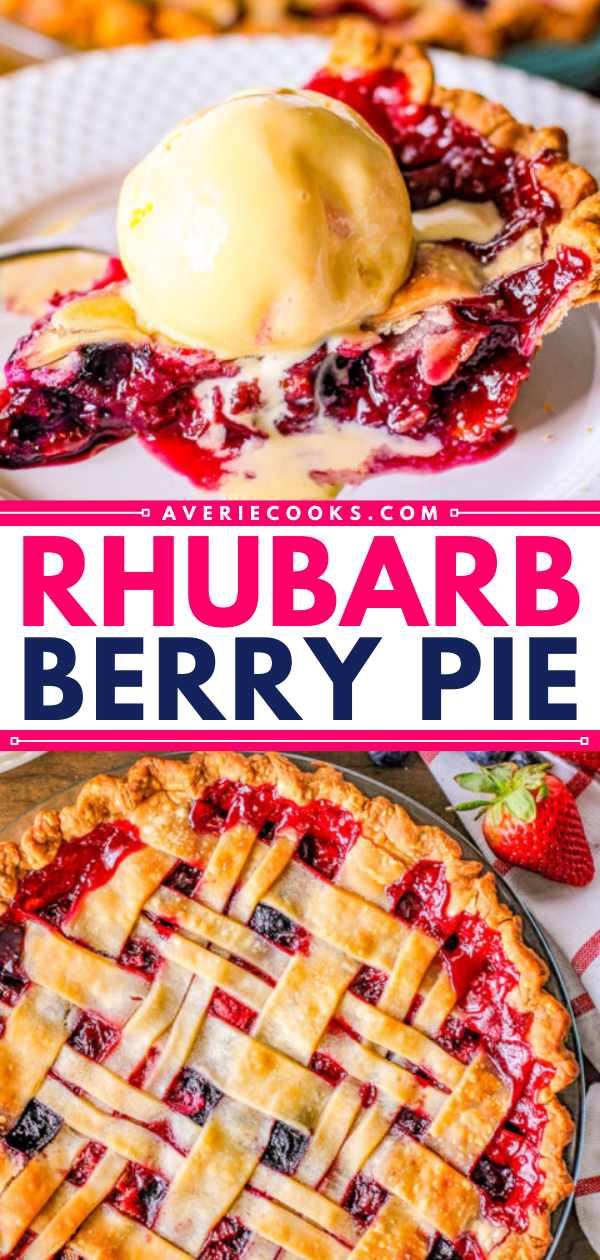
Strawberry Rhubarb Pie (with Tapioca!) — 🍓🫐❤️ A classic, EASY, fruit pie made with rhubarb, strawberries, and blueberries! Sweet yet a bit tart, very juicy, and a PERFECT spring or summer dessert! Use a store-bought pie crust to save time!
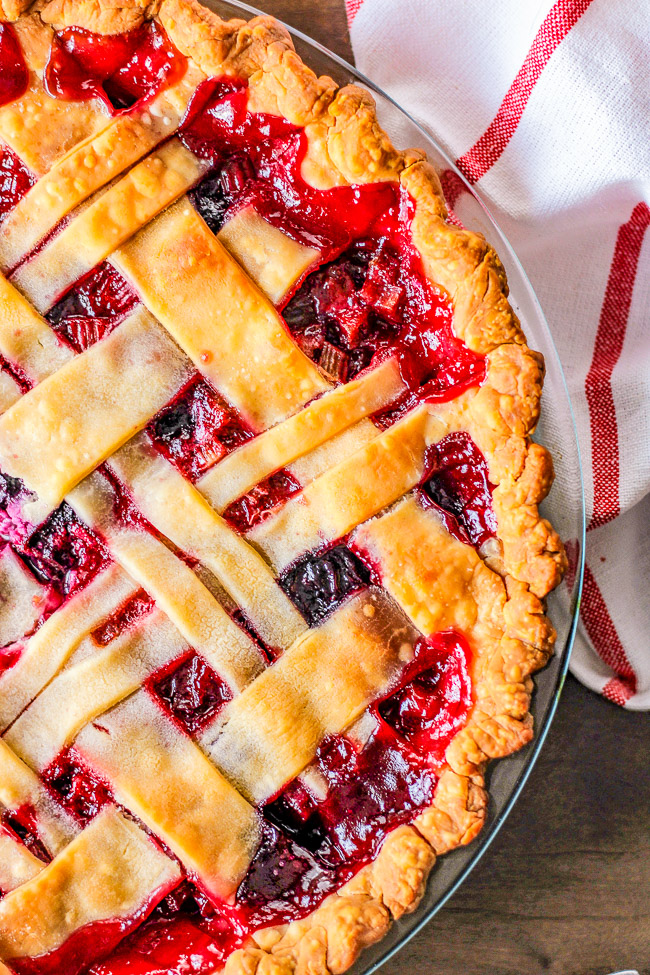
The BEST Strawberry Rhubarb Pie
I have fond childhood spring and summer memories of rhubarb practically growing wild in the gardens of my parents and out neighbors. When the onslaught started, sort of like zucchini, you better be ready to use it — although rhubarb does freeze well for up to one year.
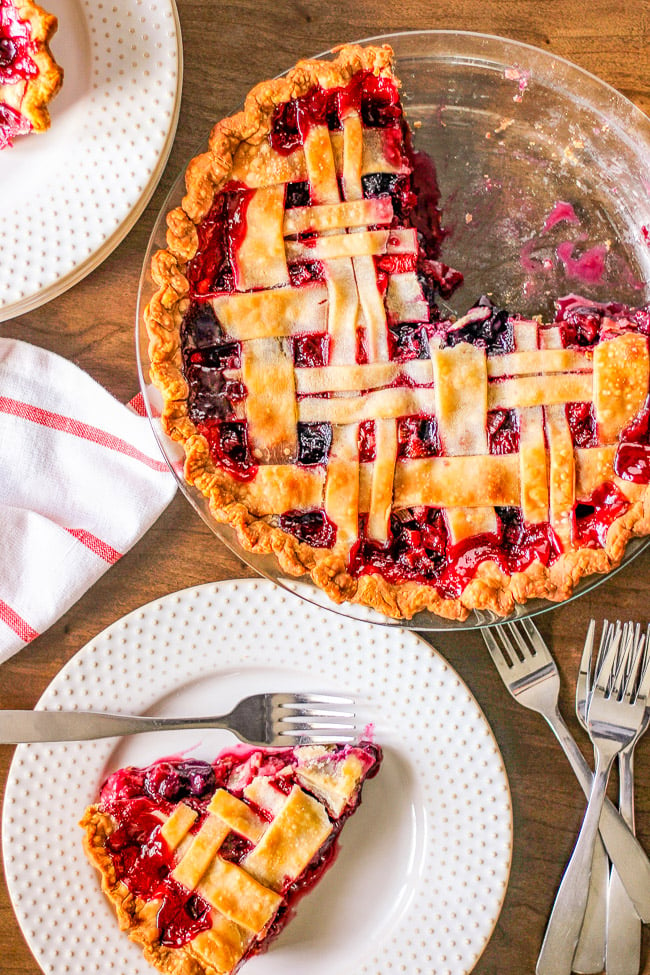
This pie is what easy-breezy spring and summer desserts are all about and is as easy as mixing together all the ingredients, putting them in a pie crust, and then topping it. It looks more impressive and difficult than it actually is!
I actually baked this as a mixed berry rhubarb pie, as I love the extra sweetness that blueberries lend to the filling. But you can make this a classic strawberry rhubarb pie, if desired.
Love fruit pies?
My fresh strawberry pie is made with just six ingredients and is bursting with juicy, fresh strawberries and covered in a delicious glaze! And my crustless blueberry pie is a fast, no-mixer, crustless pie that’s perfect for summer entertaining, picnics, or potlucks!
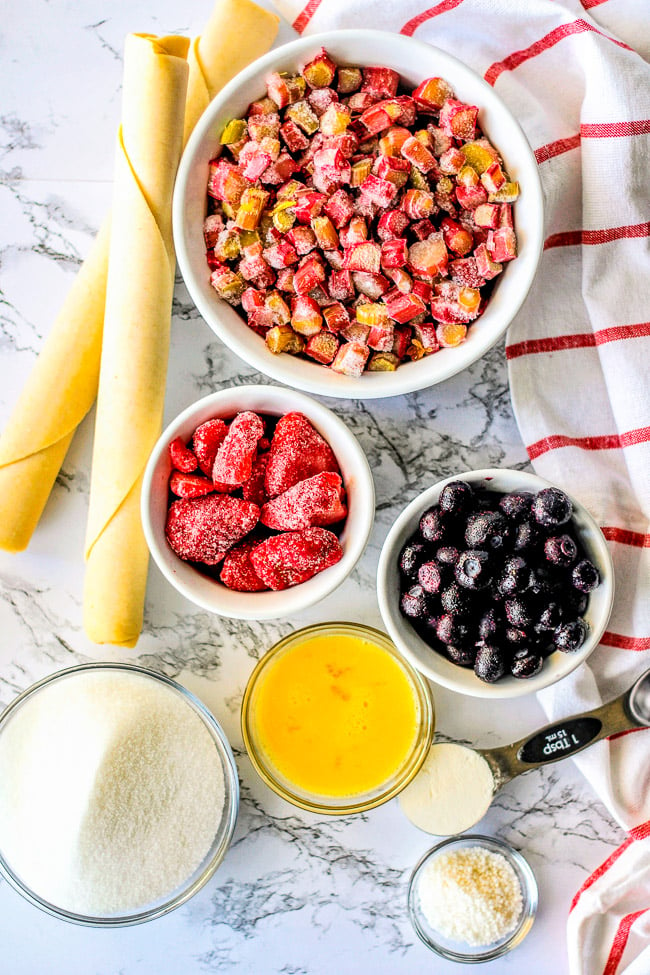
Ingredients for Strawberry Rhubarb Pie
I made this strawberry rhubarb pie with tapioca, and I’ve gone into more detail about what that is in the section below. Here’s what you’ll need:
- Refrigerated pie crusts (store-bought is fine, or make from scratch) – For this pie, I used a store-bought Pillsbury refrigerated pie crust because I don’t relish making pie crust from scratch. However, if you have the time and desire to make your own homemade crust, go for it! I have an all-butter pie crust recipe that I absolutely adore
- Rhubarb – Make sure never to eat rhubarb leaves as they can be toxic
- Strawberries
- Blueberries – You don’t have to make a strawberry-blueberry rhubarb pie like I did. If desired, you can use all strawberries and keep this a classic strawberry rhubarb pie with tapioca
- Granulated sugar
- Egg
- Quick-cooking tapioca
- All-purpose flour
Note: Scroll down to the recipe card section of the post for the ingredients with amounts included and for more complete directions.
How to Prepare Rhubarb for Pie
If you’ve never worked with fresh rhubarb before, don’t be intimidated! It requires minimal prep work, and it bakes down beautifully in a pie.
To prepare rhubarb for a pie, follow these instructions:
- When buying the rhubarb, look for crisp stalks that are slightly thinner in diameter. Wilted stalks are past their prime, and stalks that are too thick will have a woody consistency.
- Thoroughly rinse the rhubarb under running water.
- Cut the woody ends and the very tops off of the rhubarb stalks.
- Dice the rhubarb into 1-inch pieces. No need to peel them first!

How to Make Strawberry Rhubarb Pie with Tapioca
As I mentioned, this strawberry and rhubarb pie filling is fast and easy to make!
- Begin by rolling out one pie crust on a floured surface, and placing it into a 9-inch glass pie pan.
- Next, mix together trimmed rhubarb, berries, sugar, egg, and tapioca. Allow the mixture to rest for 15 to 30 minutes.
- While it’s resting, roll out the second pie crust into a 12-inch round and then slice it into twelve one-inch strips using a pizza cutter. Cut 4 of the strips in half vertically.
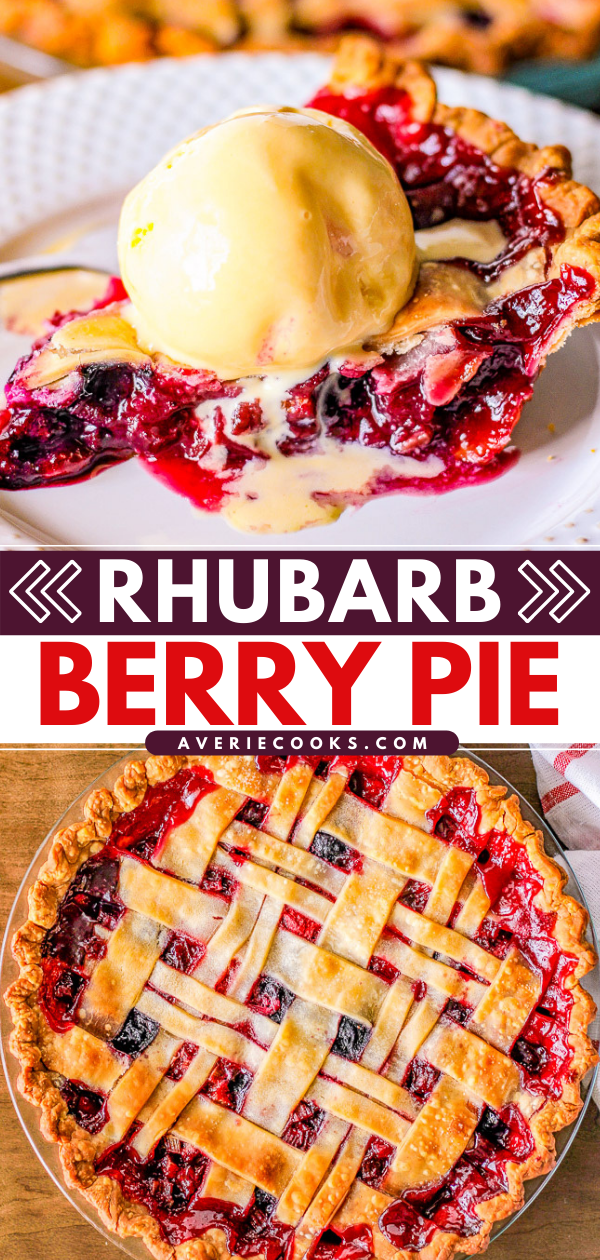
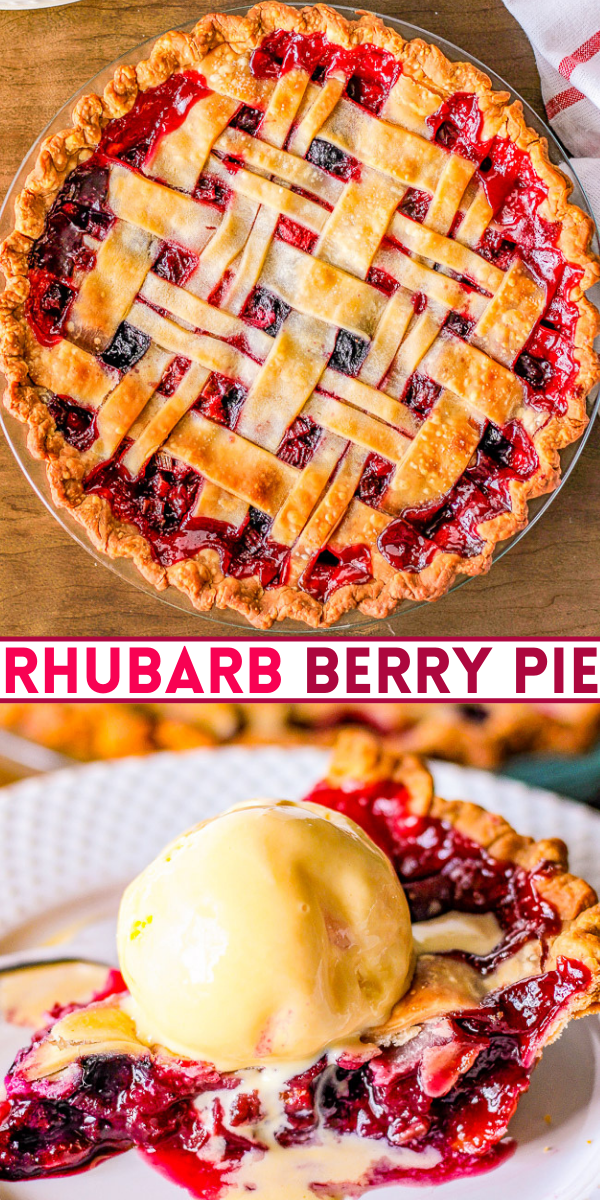
- Spoon the filling into the pie crust. Then, arrange the strips in a lattice pattern over the top.
- Cover with foil, and bake for 40 minutes.
- Remove from the oven and add foil to the crust around the perimeter of the pie so that it doesn’t burn.
- Return to the oven for an additional 25 minutes or until golden browned and bubbling.
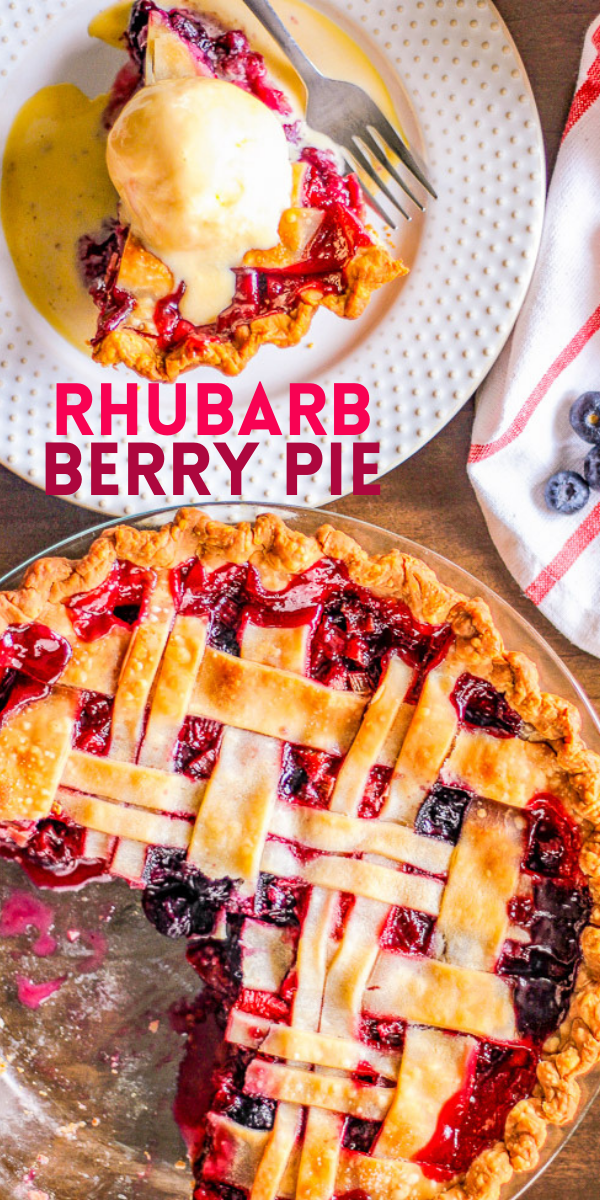
- Allow the pie to cool fully before serving, either at room temp or accelerate this by placing it in the fridge. Store leftover pie in the fridge.
Baking Tip
Bake the pie on a preheated baking sheet. This serves two wonderful purposes: in case of an overflow or bubbling over, the mess is contained on the baking sheet. Secondly, by placing the pie plate on an already hot sheet pan, the crust will start cooking immediately and this prevents a soggy crust.
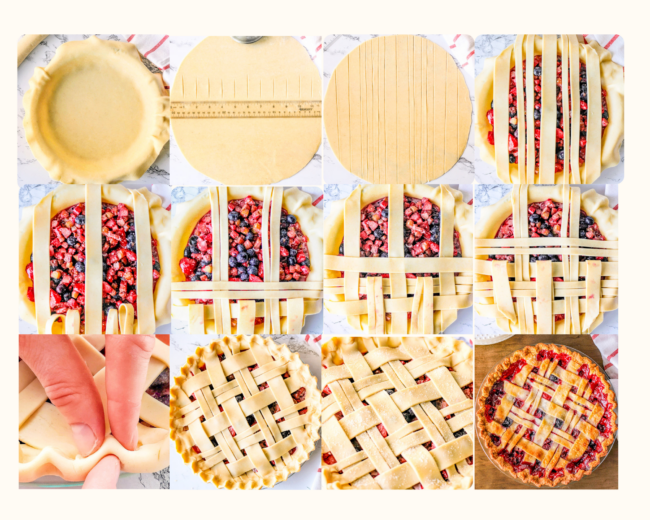
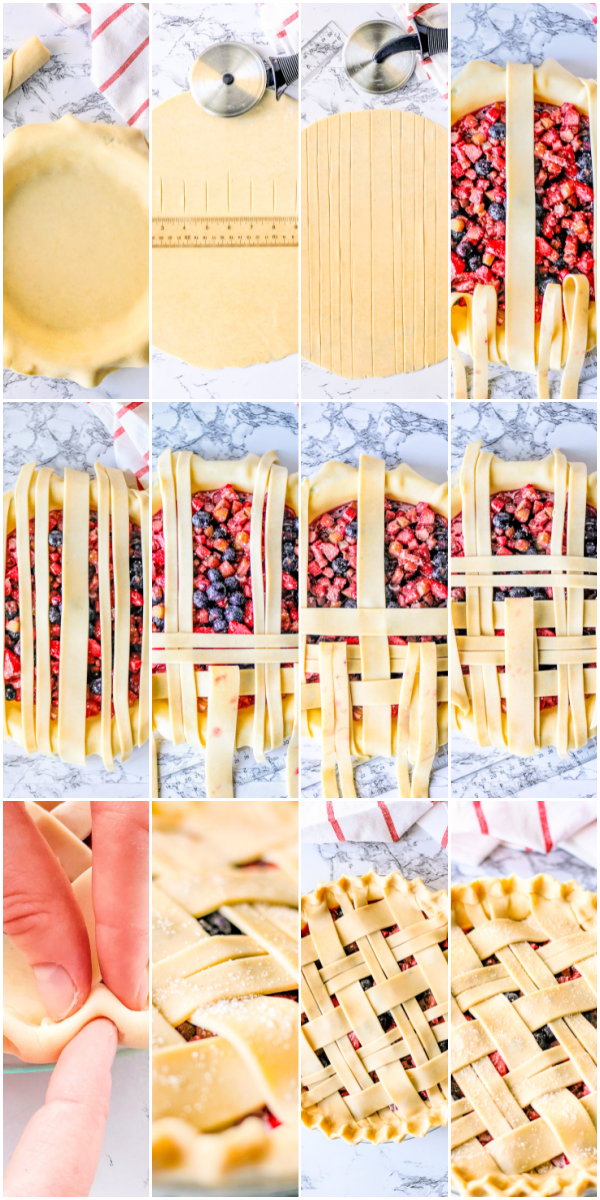
How to Make a Lattice Pie Crust
There are lots of tutorials and complicated videos on the internet showing how to make a lattice pie crust, but I tried to keep this basic. Look at the photo collages above and below for step-by-step visuals on how to make a lattice pie crust.
- After slicing the pie dough into twelve one-inch strips, I sliced four of the twelve in half vertically. Meaning there are now eight 1/2-inch strips and eight 1-inch strips.
- The 1/2-inch wide strips I keep as a “pair” and alternate them with the 1-inch wide strips, weaving in and out, up and down to make the lattice top.
- However, if you don’t want to bother with strips of two different widths since this is purely cosmetic, your pie will turn out just fine if you keep all 12 strips the same 1-inch width and make a classic lattice that way.
Please refer to the lattice collage when making your lattice top pie crust. This is truly a case where a picture is worth a million words!
Tip: Before draping and then pressing the bottom pie crust into your pie plate as well as rolling out the pie crust for the lattice top, allow the pie crust to come to room temp for about 15 minutes or it will be prone to tearing or ripping.
Storage:
Once set, cover the pie tightly with plastic wrap, and store it in the refrigerator for up to 5 days.
Recipe FAQs
Tapioca is a gluten-free starch and you need to use a form of quick-cooking tapioca such as Minute Tapioca in order to thicken the pie filling.
The nice thing about tapioca is that it’s glistening and shiny, unlike flour which can leave a cloudier and duller appearance to your finished pie.
I am sure that somehow you could use flour or even cornstarch as a thickener. However, I haven’t tested it so can’t say for sure what quantity to use. If you substitute the tapioca, please leave a comment below letting me know what worked!
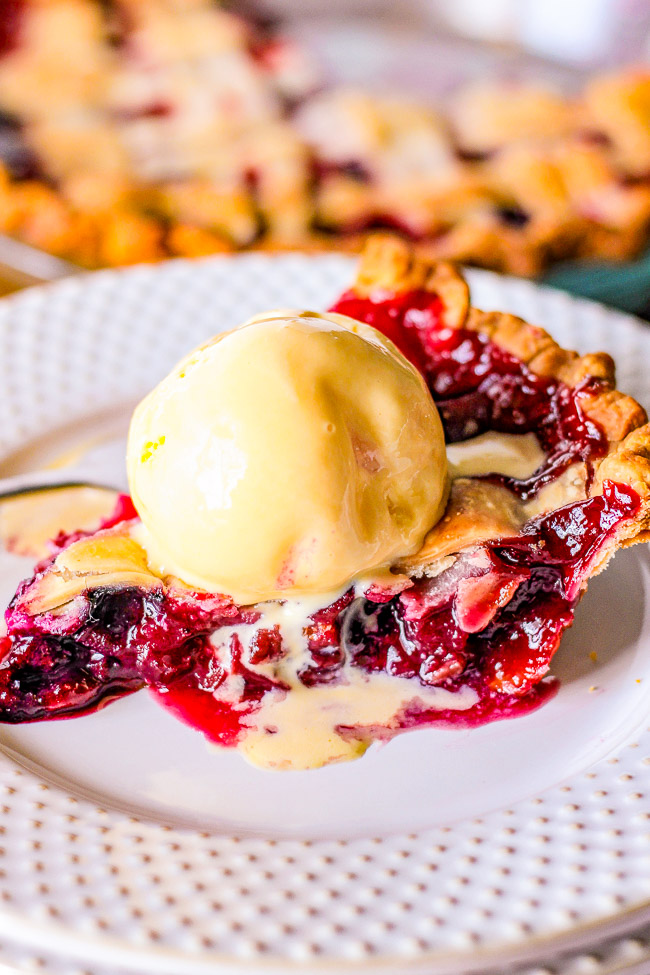
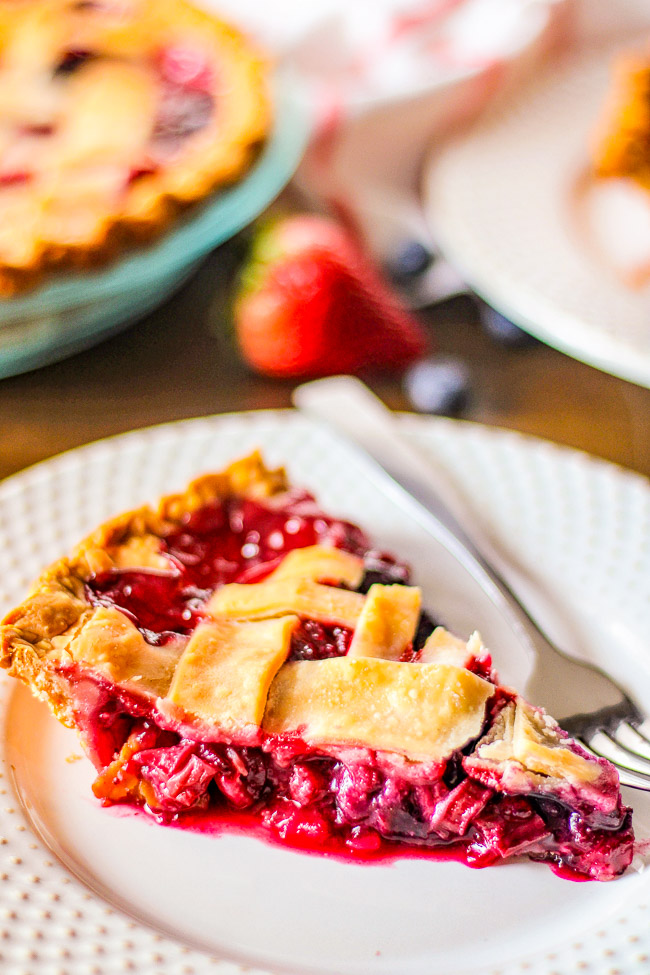
Rhubarb pie can be served warm or chilled. If you don’t allow for it to cool completely before slicing, that’s fine but expect it to have a much messier presentation. It’s fabulous with a scoop of vanilla ice cream, whipped cream, whipped topping, or simply plain.
Yes! If you’re using frozen, measure out the 3 cups, then thaw it, and finally drain any excess water.
I used some fresh and some frozen strawberries, and frozen blueberries. Although you can really use any combo of fresh or frozen — blueberries or strawberries.
If you’re using frozen fruit, it doesn’t have to be completely thawed. I’d say a little over halfway thawed is fine.
Neither frozen strawberries nor blueberries will release excess liquid so you don’t have to worry too much about draining them.
Enjoy AverieCooks.com Without Ads! 🆕
Go Ad Free
Preheat oven to 375F and place a baking sheet or pizza stone inside the oven to heat up as well.
Allow the refrigerated pie crusts to soften for about 15 minutes on a clean counter before flouring your countertop as needing to prevent sticking, rolling out one pie crust, and draping it into a greased 9-inch glass pie plate; set aside.
While waiting for the pie crusts to come up to warm temp, to a large bowl, add the rhubarb, strawberries, blueberries, 1 cup sugar, egg, minute tapioca, flour, and gently stir together, and allow the mixture to stand for 15 to 30 minutes. This allows the fruit to release its natural juices and tapioca starch to start working to thicken them.
Meanwhile, sprinkle your counter with additional flour to prevent sticking, flatten the second crust with a rolling pin, and roll it out so that it’s 12 inches in diameter.
Using a pizza cutter/wheel, slice the crust into 1-inch wide strips, making 12 strips.
Vertically slice 4 of those strips in half to create 8 thinner strips (1/2-inch each in width); leave these strips in pairs.
Arrange the strips in lattice design over filling.***
Seal and flute edges of the pie plate using your fingers.
Evenly sprinkle the top with about 2 tablespoons sugar.
Cover the entire pie plate with foil, place on the preheated baking sheet (helps guard against accidental overflow and also begins cooking the bottom crust immediately and prevents a soggy bottom) and bake for 40 minutes.
Remove the pie plate from the oven, remove the foil, and create a barrier of foil to just cover around the crust around the perimeter of the pie plate. This strategically placed foil helps prevent excess browning/burning. Bake for an additional 25 to 30 minutes, or until the filling is bubbling and the lattice crust is lightly golden browned. Watch your pie and not the clock, noting it could finish earlier/later than the estimates given and it’s your job to watch it so it doesn’t burn or come out underdone based on how your oven operates, fresh vs. frozen fruit, etc.
Allow the pie to cool on a wire rack for about 2 hours at room temp before slicing and serving, or until completely set. You can accelerate this process by placing the pie in the fridge.
Serve with ice cream, whipped cream or whipped topping, or plain. Store leftover pie well-covered (airtight) in the fridge for up to 5 days.
**You can use either fresh or frozen berries. If using frozen, you only need to allow them to thaw about half-way. Blackberries or raspberries may also be substituted in place of the strawberries and blueberries.
***Refer to the collage photo in the blog post to see how I made the lattice top. There are lots of tutorials and complicated videos on the internet, but I tried to keep this basic. The 1/2-inch wide strips I keep as a “pair” and alternate them with the 1-inch wide strips, weaving in and out, up and down. However, if you don’t want to bother with this, your pie will turn out just fine if you keep all 12 strips the same 1-inch width and make a classic lattice that way.
Serving: 1piece, Calories: 236kcal, Carbohydrates: 43g, Protein: 3g, Fat: 6g, Saturated Fat: 2g, Polyunsaturated Fat: 1g, Monounsaturated Fat: 3g, Trans Fat: 0.003g, Cholesterol: 20mg, Sodium: 97mg, Potassium: 203mg, Fiber: 2g, Sugar: 28g, Vitamin A: 89IU, Vitamin C: 16mg, Calcium: 51mg, Iron: 1mg
Nutrition information is automatically calculated, so should only be used as an approximation.
©averiecooks.com. Content and photographs are copyright protected. Sharing of this recipe is both encouraged and appreciated. Copying and/or pasting full recipes to any social media is strictly prohibited.
More Strawberry Desserts:
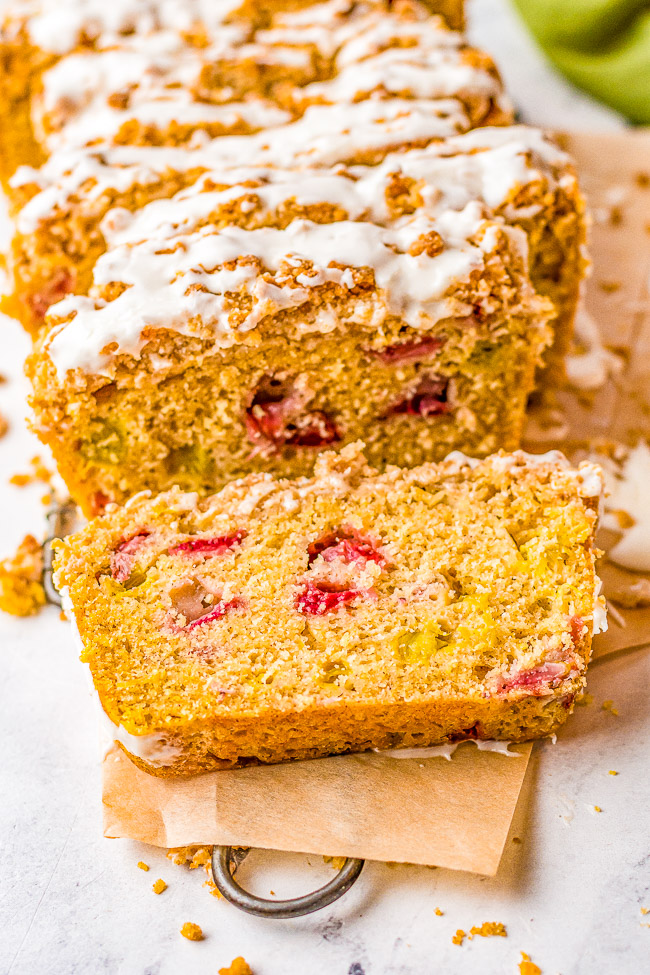
Strawberry Rhubarb Bread – This EASY, no-mixer quick bread is full of spring and summer flavors! Sweet strawberries and tart rhubarb are used to make this delightful bread that’s topped with a buttery CRUMBLE and then GLAZED!
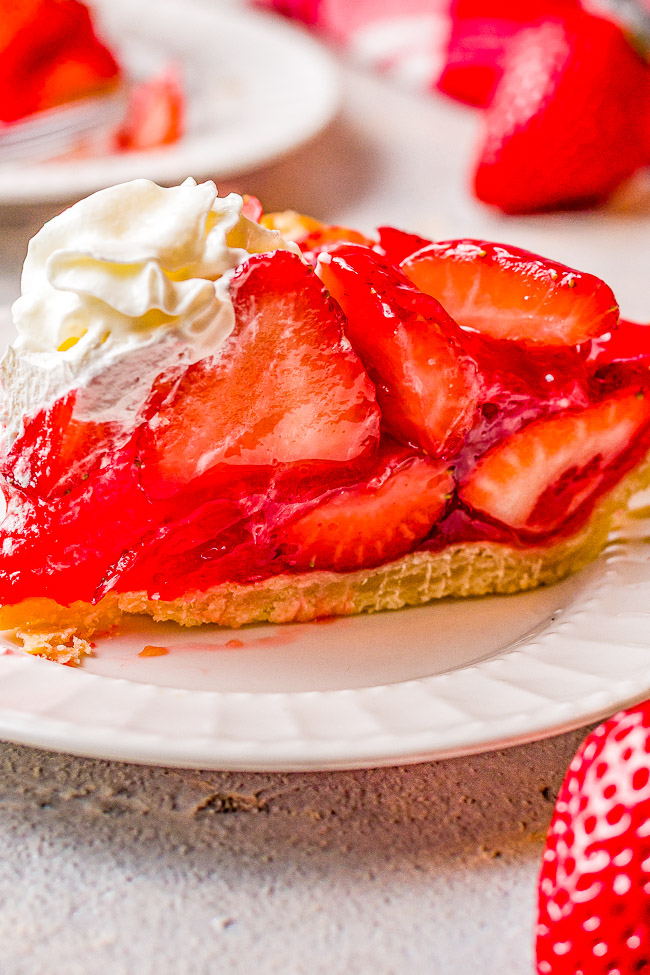
Fresh Strawberry Pie — This EASY strawberry pie is bursting with juicy, fresh strawberries and covered in a delicious glaze! Use a homemade flaky crust OR a refrigerated store-bought crust for this amazing pie that everyone LOVES!
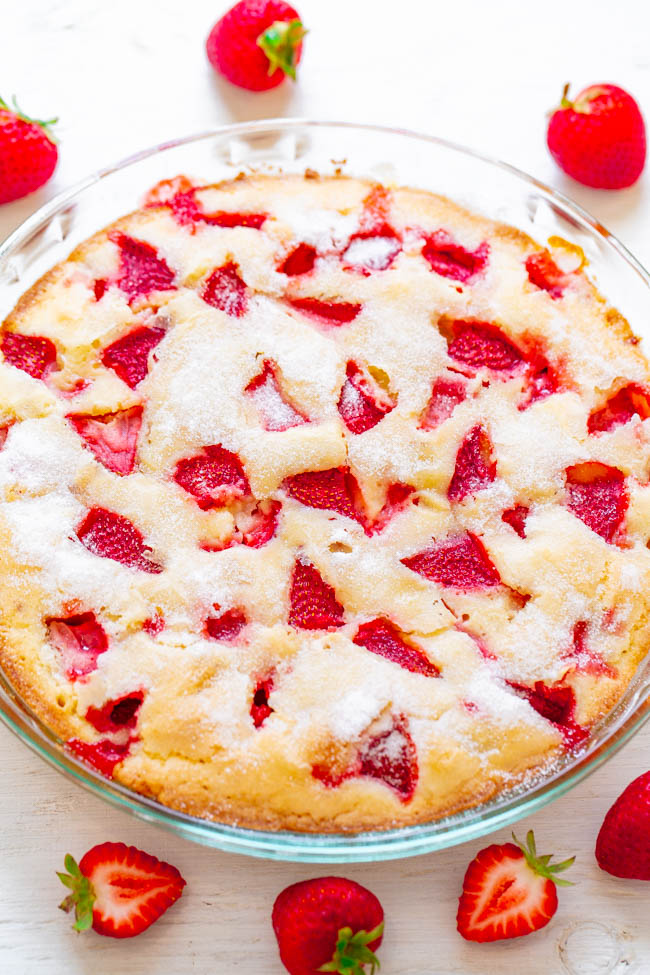
Crustless Strawberry Pie — FAST, super EASY, no-mixer dessert that’s perfect for summer entertaining, picnics, or potlucks! Somewhere in between pie, cake, and blondies is what you get with this FABULOUS recipe! Take advantage of those FRESH strawberries!
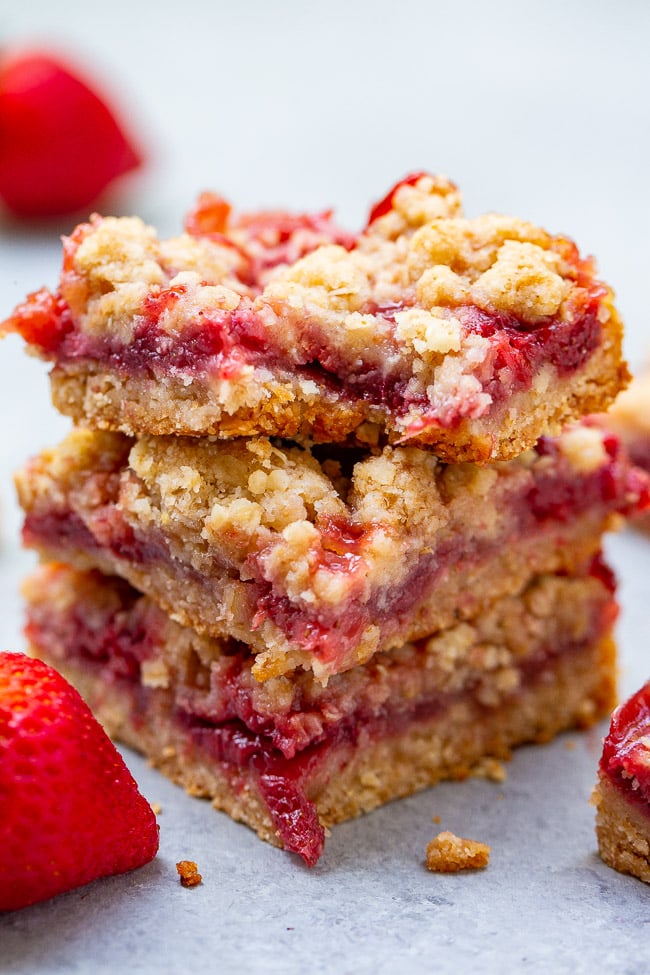
Strawberry Oatmeal Bars with Crumble Topping — These buttery bars are bursting with fresh strawberries! Just 10 minutes of prep, so EASY because the crust and crumble are one and the same, and a crowd FAVORITE every time!
Strawberry Bars — Easy, no mixer bars with a shortbread crust, one pound of fresh berries, a layer of sweet custard, and creamy whipped topping! A perfect warm weather dessert that everyone LOVES!

Lemon Strawberry Bars — Imagine crossing lemon bars with a strawberry pie. These easy bars taste like strawberry lemonade! Sooo good!
Originally posted May 14, 2021 and reposted March 28, 2025 with updated text.
www.averiecooks.com (Article Sourced Website)
#Rhubarb #Berry #Pie